Different Ways of Handling Dynamic Routing in Next.js
When developing any front-end project, you must have come across routing. Even though having a static website still it would have some route configured.
Routing helps you load different components, based on users' requirements. The user is given the option to choose from the various options to choose from. Like the home screen bar which can take the user to different pages like careers, blogs, contact us etc.
So it is a sure thing that if we are making a webpage or mobile application, it is a must to implement a perfectly working routing. So let us discuss about the concept of Dynamic Routing in the next section which helps us reuse the code.
Source Code for the following code for your reference.
Code: github.com/apoorvtomar2222/dynamic-route-ne..
Dynamic Routing
Dynamic Routing is the ability of a web application of handling different routes dynamically, and return the result based on the parameters provided.
A static route can be defined as a page that returns the same component, regardless of the time the user clicks on it. But on the contrary in the case of dynamic routing user is shown different data based upon the parameters provided in the route.
Dynamic Route Example
Consider a blogging website, and users will have the option to choose from the available blogs. For handling such scenarios we will be required to load the dynamic routing otherwise there would be lots of redundant code.
The user will be clicking on the desired blog, and using an id we will be loading the same component with different data. Here’s how we will be reusing the components.
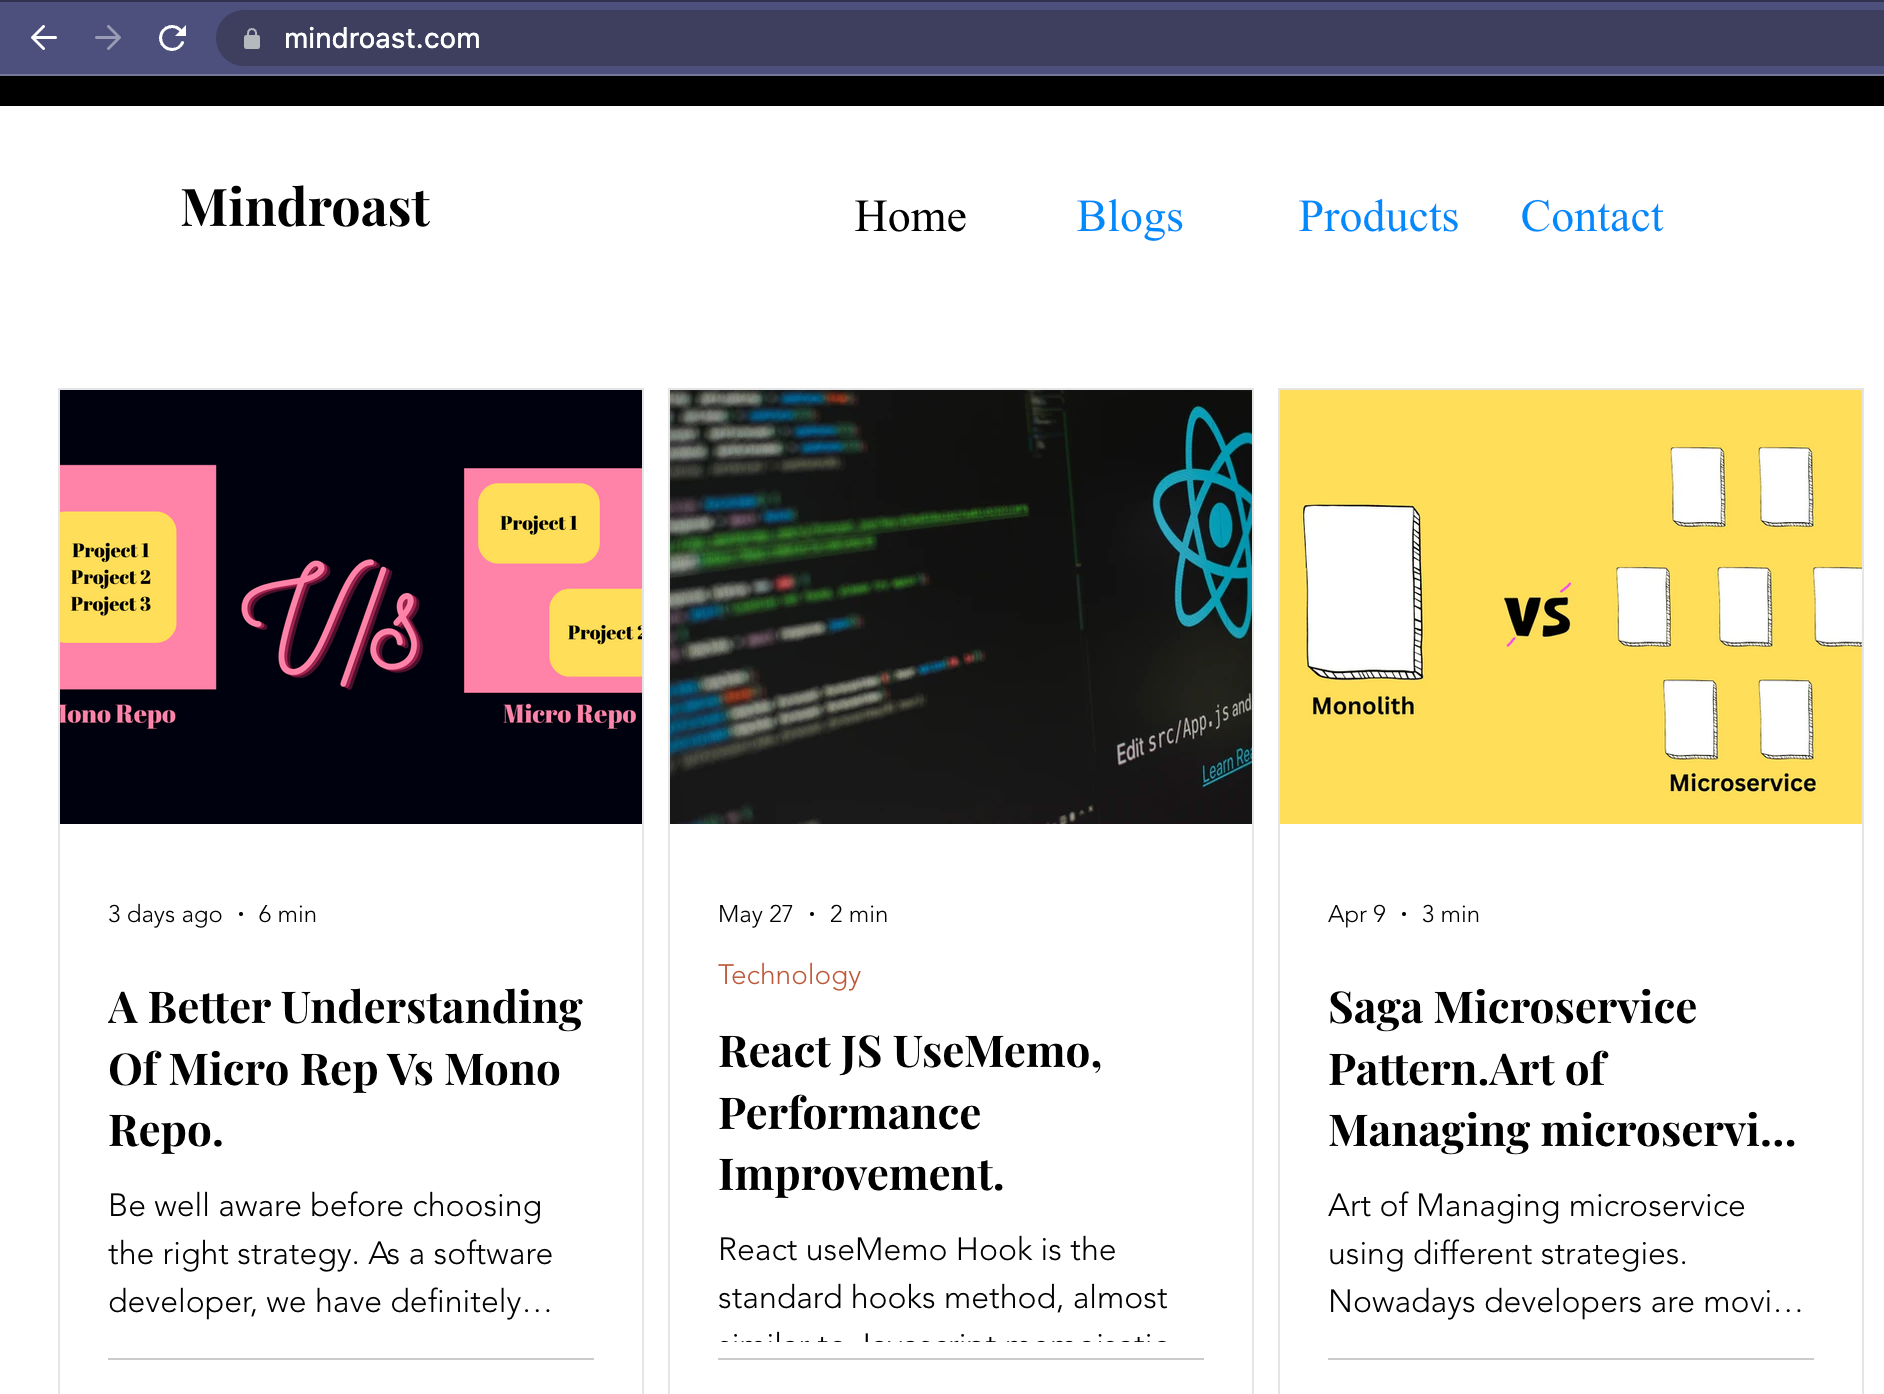
In the image below we have multiple articles which can be loaded based on the route. The code of displaying the article will remain the same, the only difference as told earlier would be data.
Next.js Routing Simplified
In nextjs we can do a simple route setup using the following way. But firstly we set up a basic project of next js, using basic commands which are present on their official documentation (https://nextjs.org/). Hopefully, if you reading an article related to routing you already have a project ready.
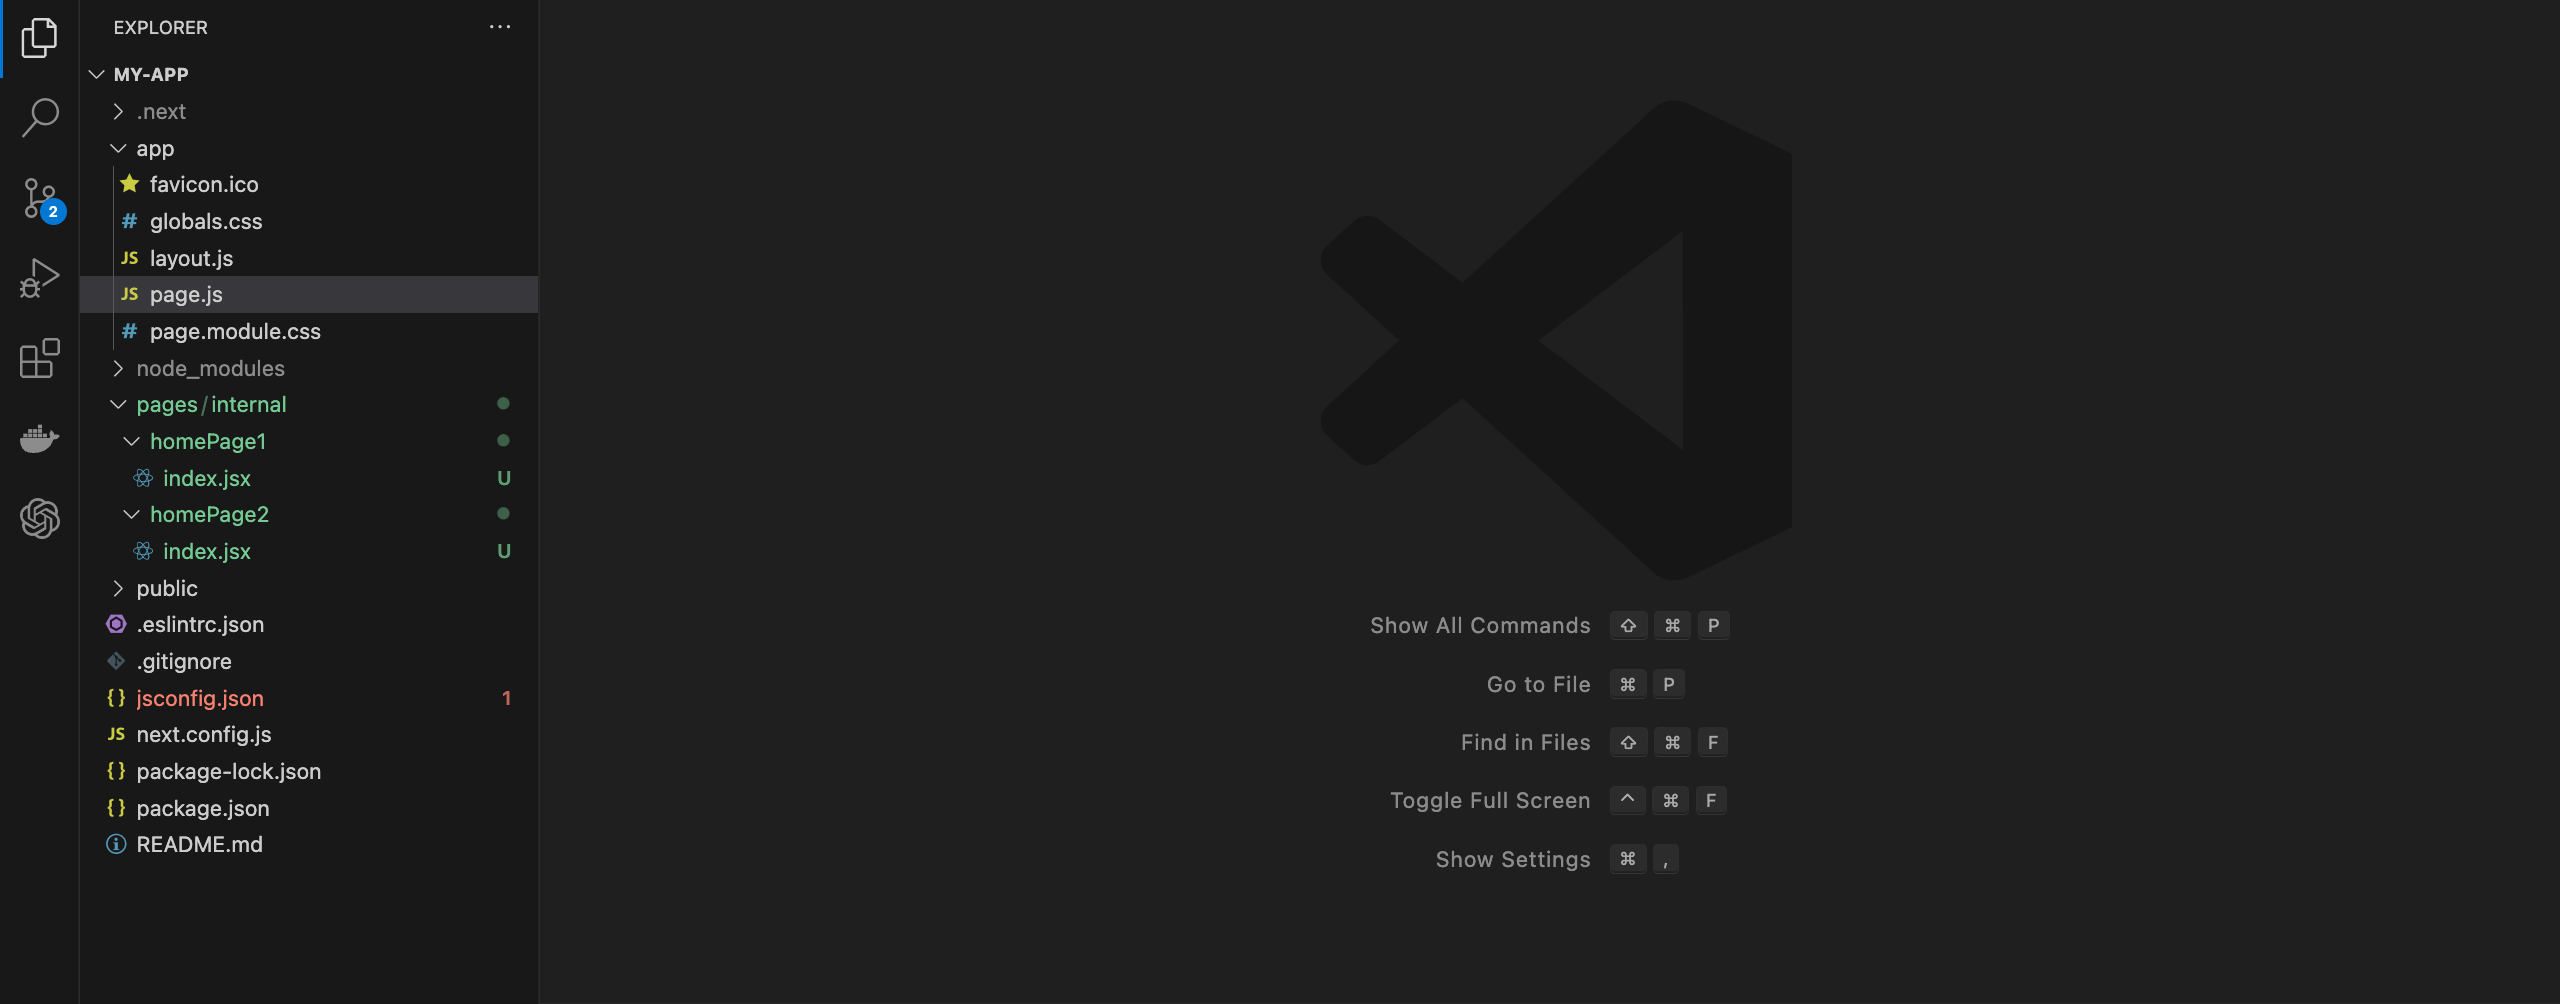
Now let us suppose we have two pages, let us call them homePage1 and homePage2.
So here you can see that inside the pages folder, we have two subfolders i.e. with the name homePage1 and homePage2 which denotes two different routes in terms of Next JS.
Start your application by following the command:
npm run dev
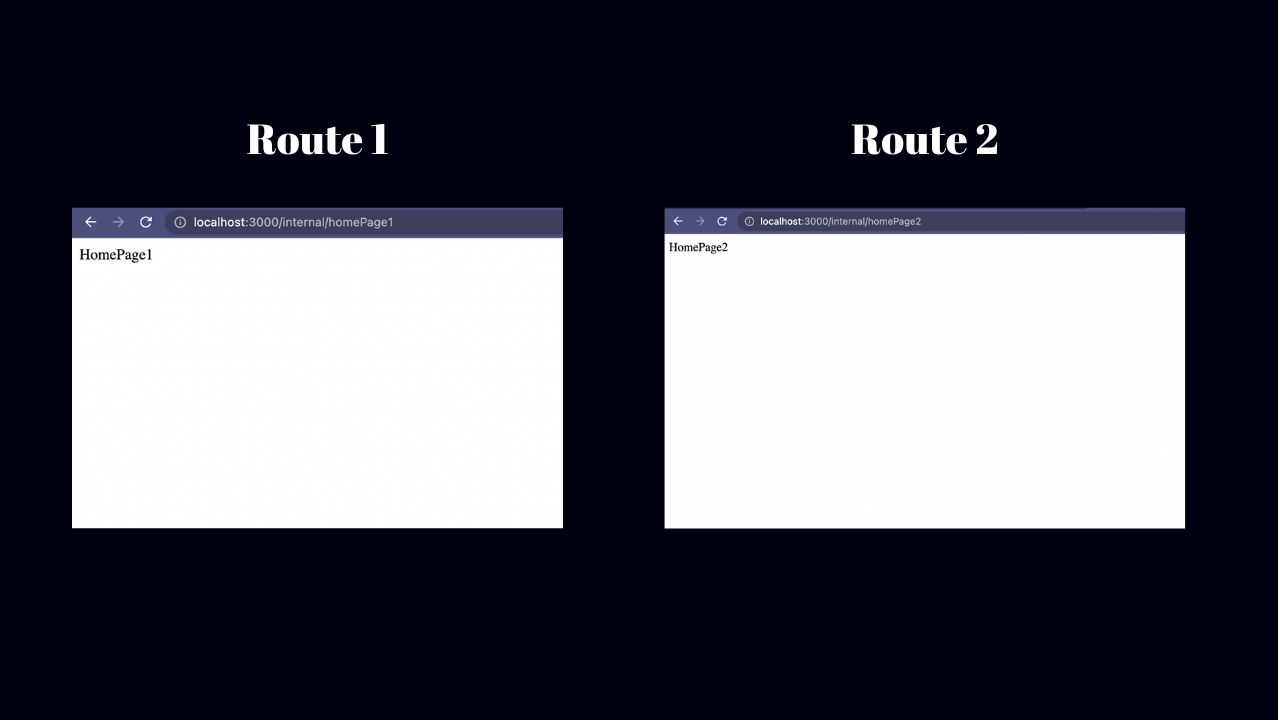
Now if you open two routes on your browser i.e.
Problem Statement for Dynamic
Now since we have defined two different routes, for different scenarios but imagine if we have a blogging website having thousands of blogs.
Defining components for each and every blog isn’t possible so a better obvious way is writing the dynamic routing. Let us explore different ways of configuring dynamic routes in the same application.
Implementing Basic Dynamic Routing
Dynamic routing can be implemented in multiple different ways, one such possible and simple way is as follows.
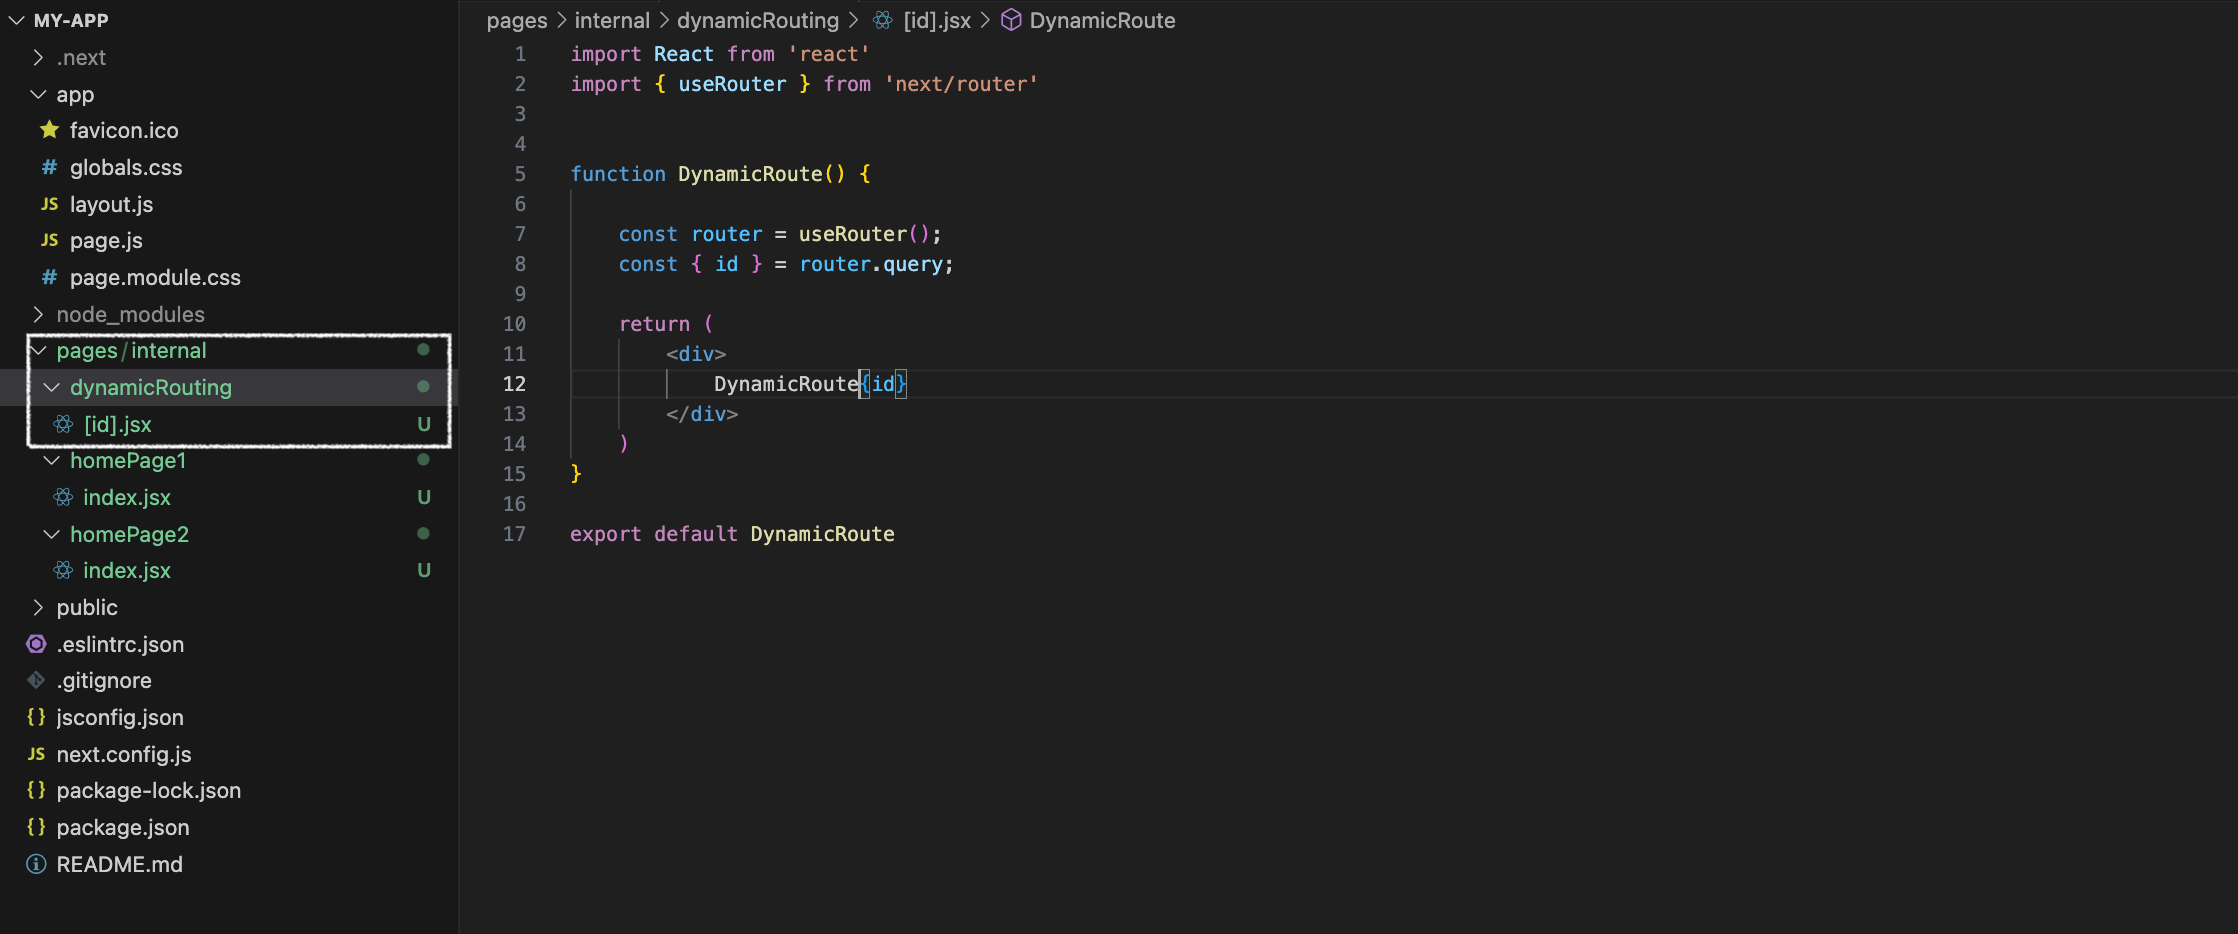
Here in the following screenshot 3, you can see that we have created a component named Dynamic routing, which has a file as [id].jsx. This id is the dynamic field that is passed in the route. In our case, we will pass it from the browser.
If we open any route with the prefix as following route it will open the same page but with different values.
http://localhost:3000/internal/dynamicRouting/[id]
The dynamic id can be fetched in the component inside the component with the router hook. The same can be seen in the pic above (screenshot 3)
const router = useRouter(); const { id } = router.query;
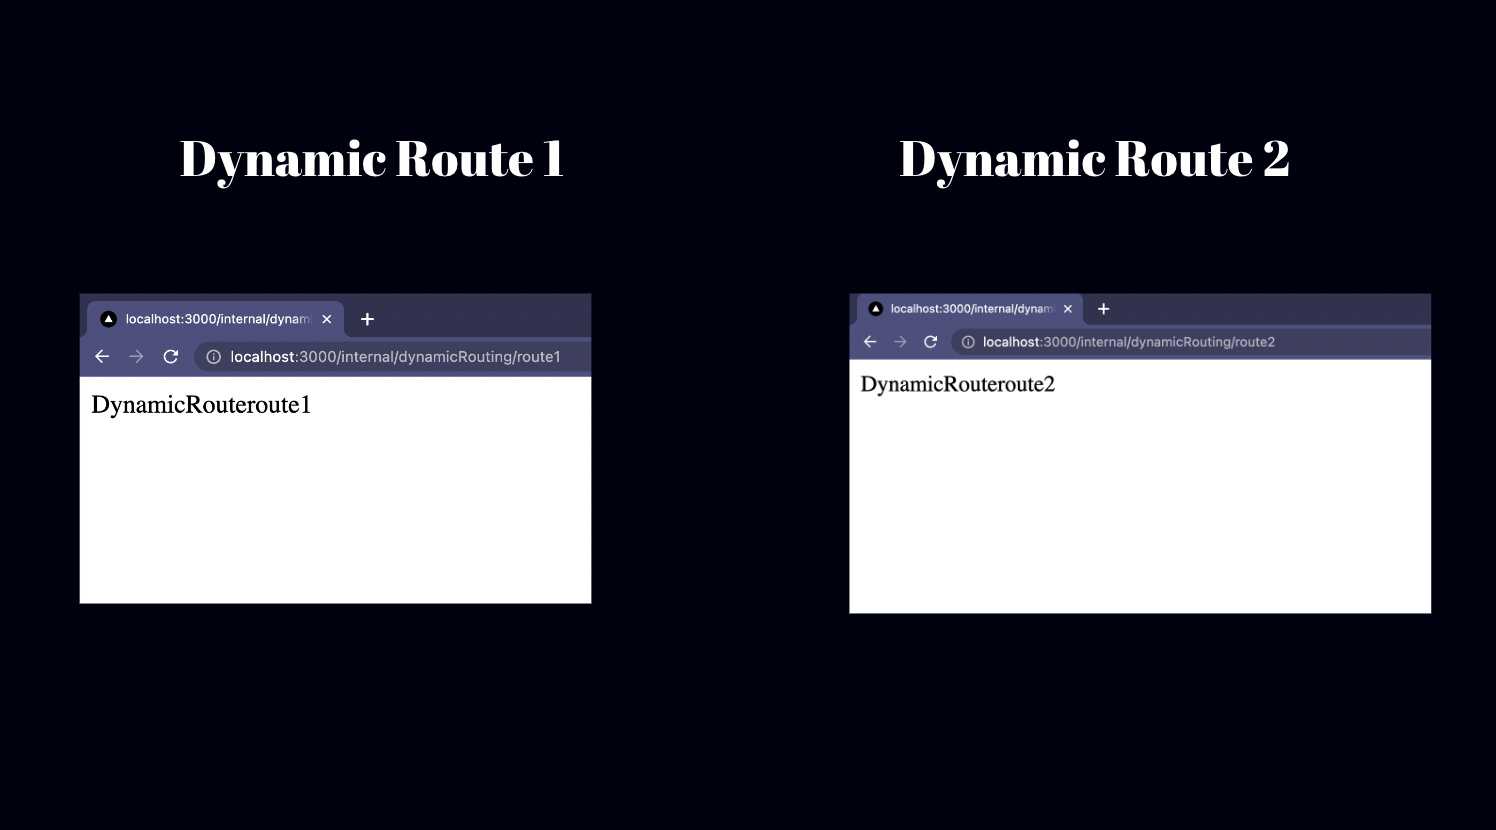
The same can be seen in screenshot 4, where we are loading two different routes. The dummy ids which I provided for each page are route1 and route2 which is showing the user interface.
You can also pass the id of the article and your logic will remain intact and reusable. Now we will be moving to more next level of reusing the component for two different cases.
Advance Problem Statement for Dynamic Routing
The scenario which we will be taking would be of writing logic for add/edit page. In the case of add, we don't require to send the id, but on wise versa in the case of edit, we are required to send some id to fetch the relevant data.
So we will be discussing two approaches I figured out for doing the same which can be easily used for any production-grade application.
Next.js — Combined Add/Edit (Create/Update) Page
Making a Parent Component and Loading the right child component.
Handling Based Upon Route.
1. Making a Parent Component and Loading the right child component.
We will create a simple add and edit component, which we will be calling from the desired location.
Based upon the individual component we will be calling the common component i.e. AddEdit. Basically, AddEdit is a form that will display the fields, either with or without data.
Following we can find the code for add component which will in return call the AddEdit component with the mode key i.e. ‘add’.
Add Component Path*: pages/internal/addEdit/add.jsx*
// import React from 'react' import AddEdit from './addEdit'
function Add() { return (
export default Add
Edit Component
Now we create another component as discussed above, i.e. edit page. This edit component will also in turn call the addEdit common component with the mode as ‘edit’.
***Path: *pages/internal/addEdit/edit.jsx
import React from 'react' import AddEdit from './addEdit'
function Edit() { return (
export default Edit
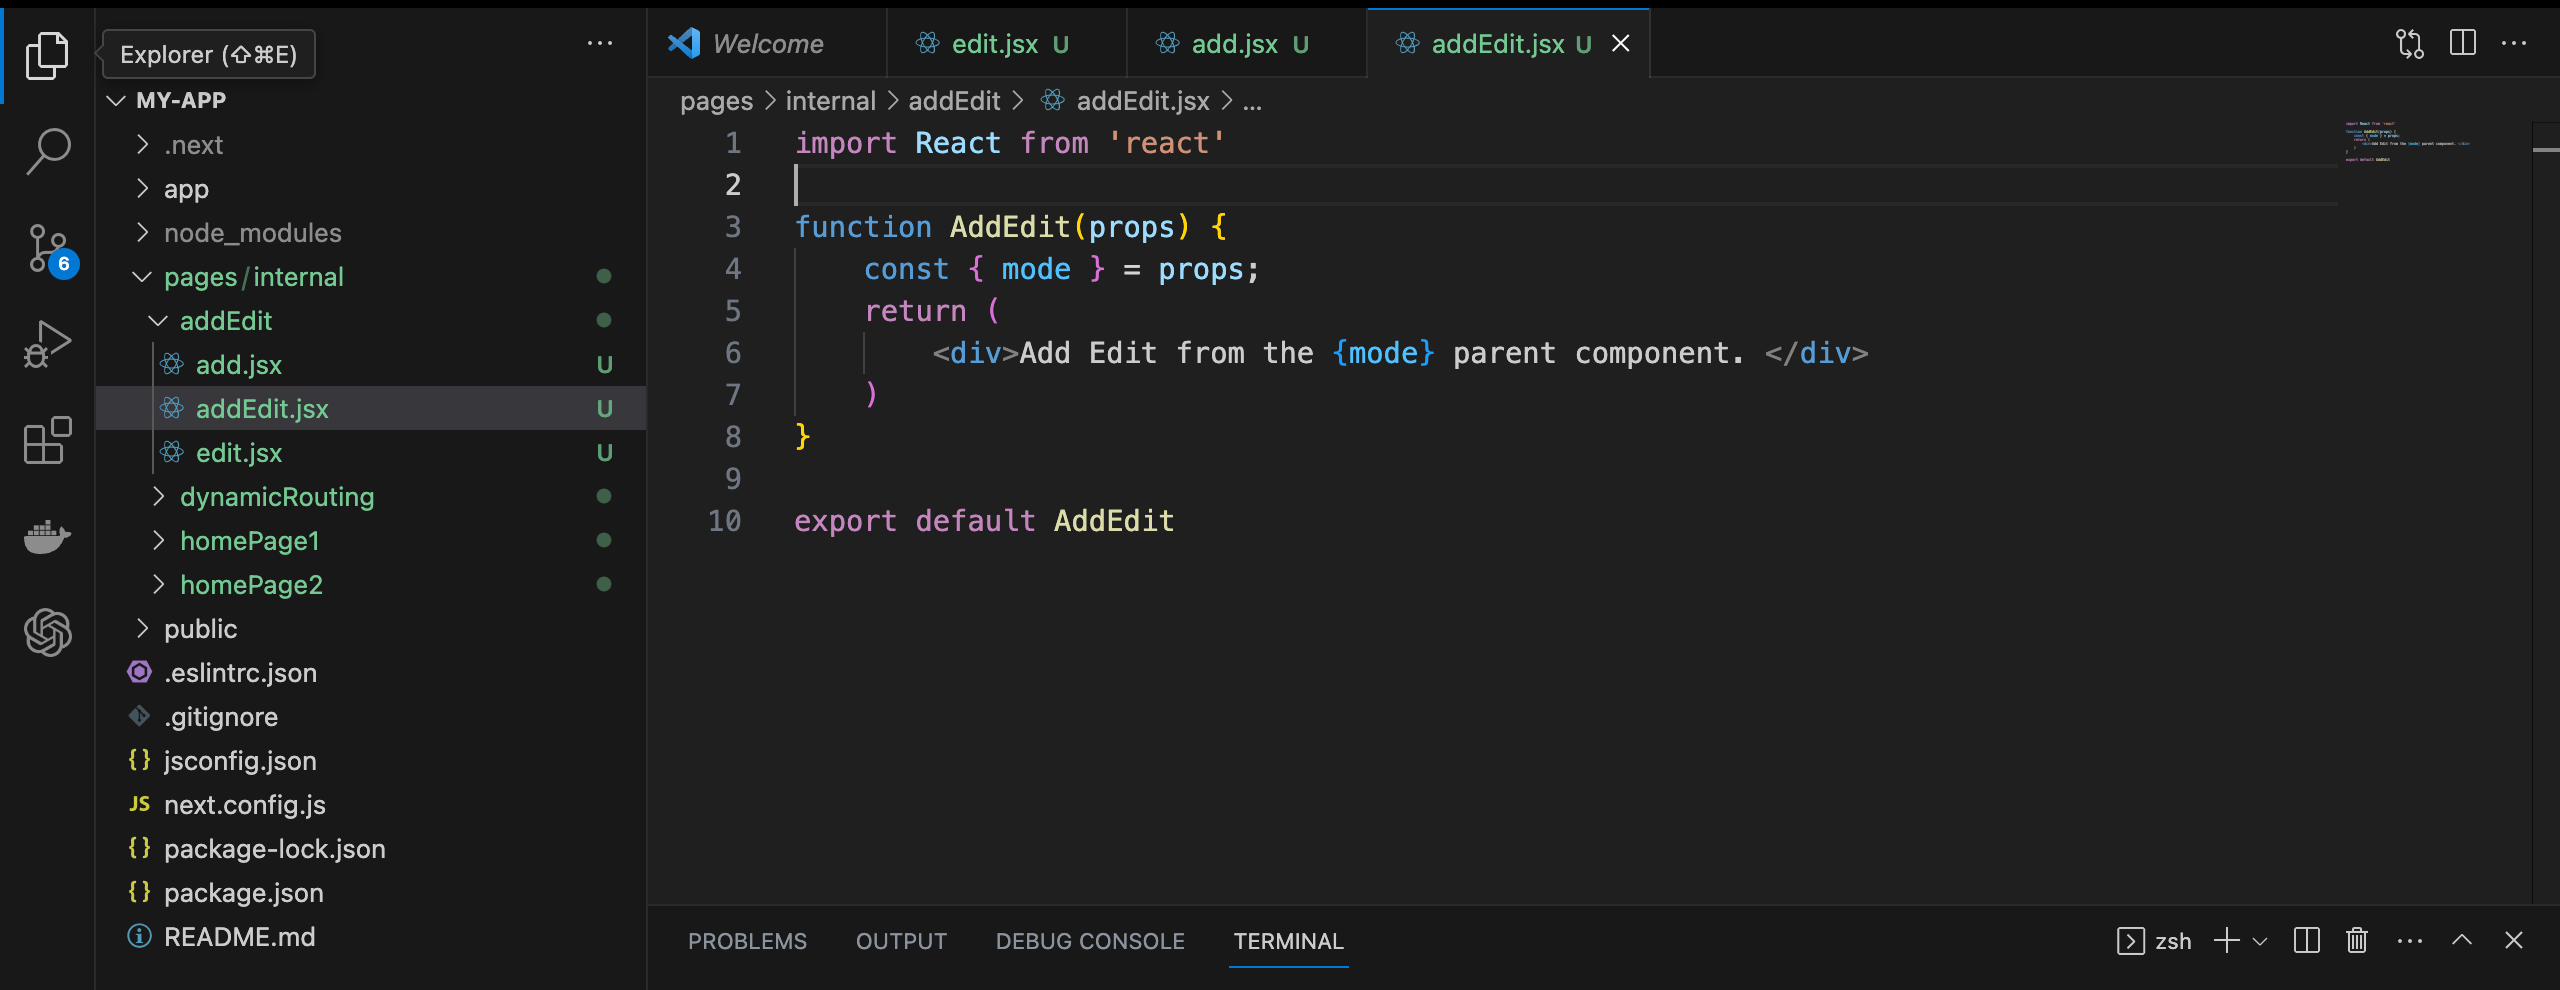
Add Edit Form Component Path: pages/internal/addEdit/addEdit.jsx
Now our addEdit component will get the required data from the parent component. Based on the required data the addEdit form, will render the user interface.
import React from 'react'
function AddEdit(props) { const { mode } = props; return (
Add Edit from the {mode} parent component.
export default AddEdit
Screenshot 5 for the code structure, here we can easily find the folder addEdit component.
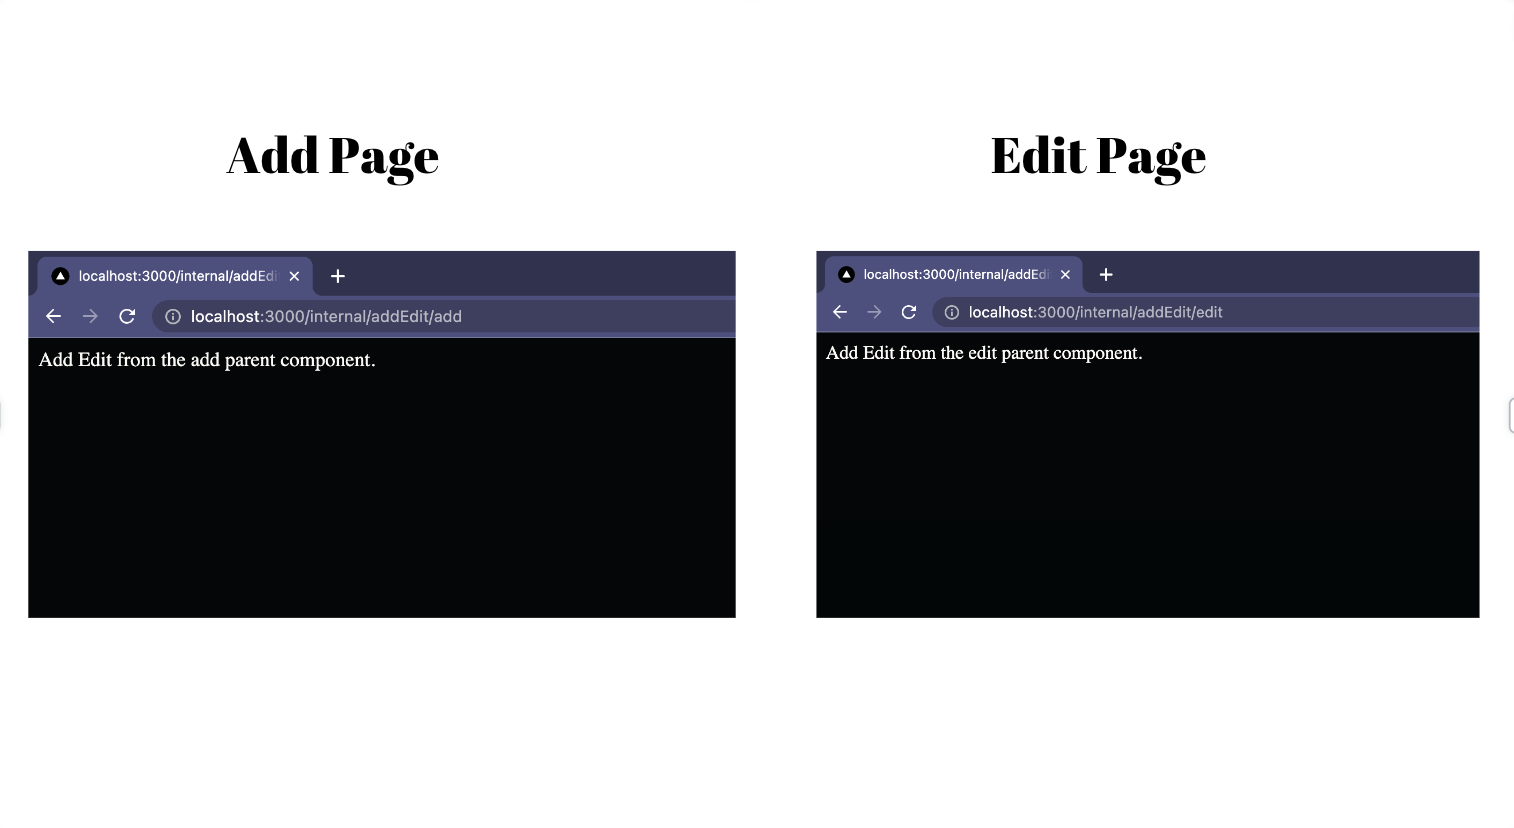
Now to access the add and edit form, simply load the route
Following you can see both the pages are successfully rendered. We are resuing the addEdit component here. Just required to create a parent component to do all this pre-processing.
2. Handling Based Upon Route.
path: pages/internal/addEdit2/[id].jsx
While using this another way of solving the problem, here we don't have to create two different parent components. Here we are catering the solution based on the single dynamic route.
In the following code, we can see, I have checked if the passed id is “add” or some random “id”. Using this we can simply figure out if the user wants to open the add page or edit page.
Based on the variable finalId we can make further the following action.
Fetching the data.
Making submit API call
Setting up the form initials.
import { useRouter } from 'next/router' import React from 'react'
function AddEdit2() { const router = useRouter(); const { id } = router.query; const finalId = id !== 'add' ? id : null; return (
{finalId != null ? 'Edit' : 'Add'} Page
) }
export default AddEdit2
AddEdit 2 Component
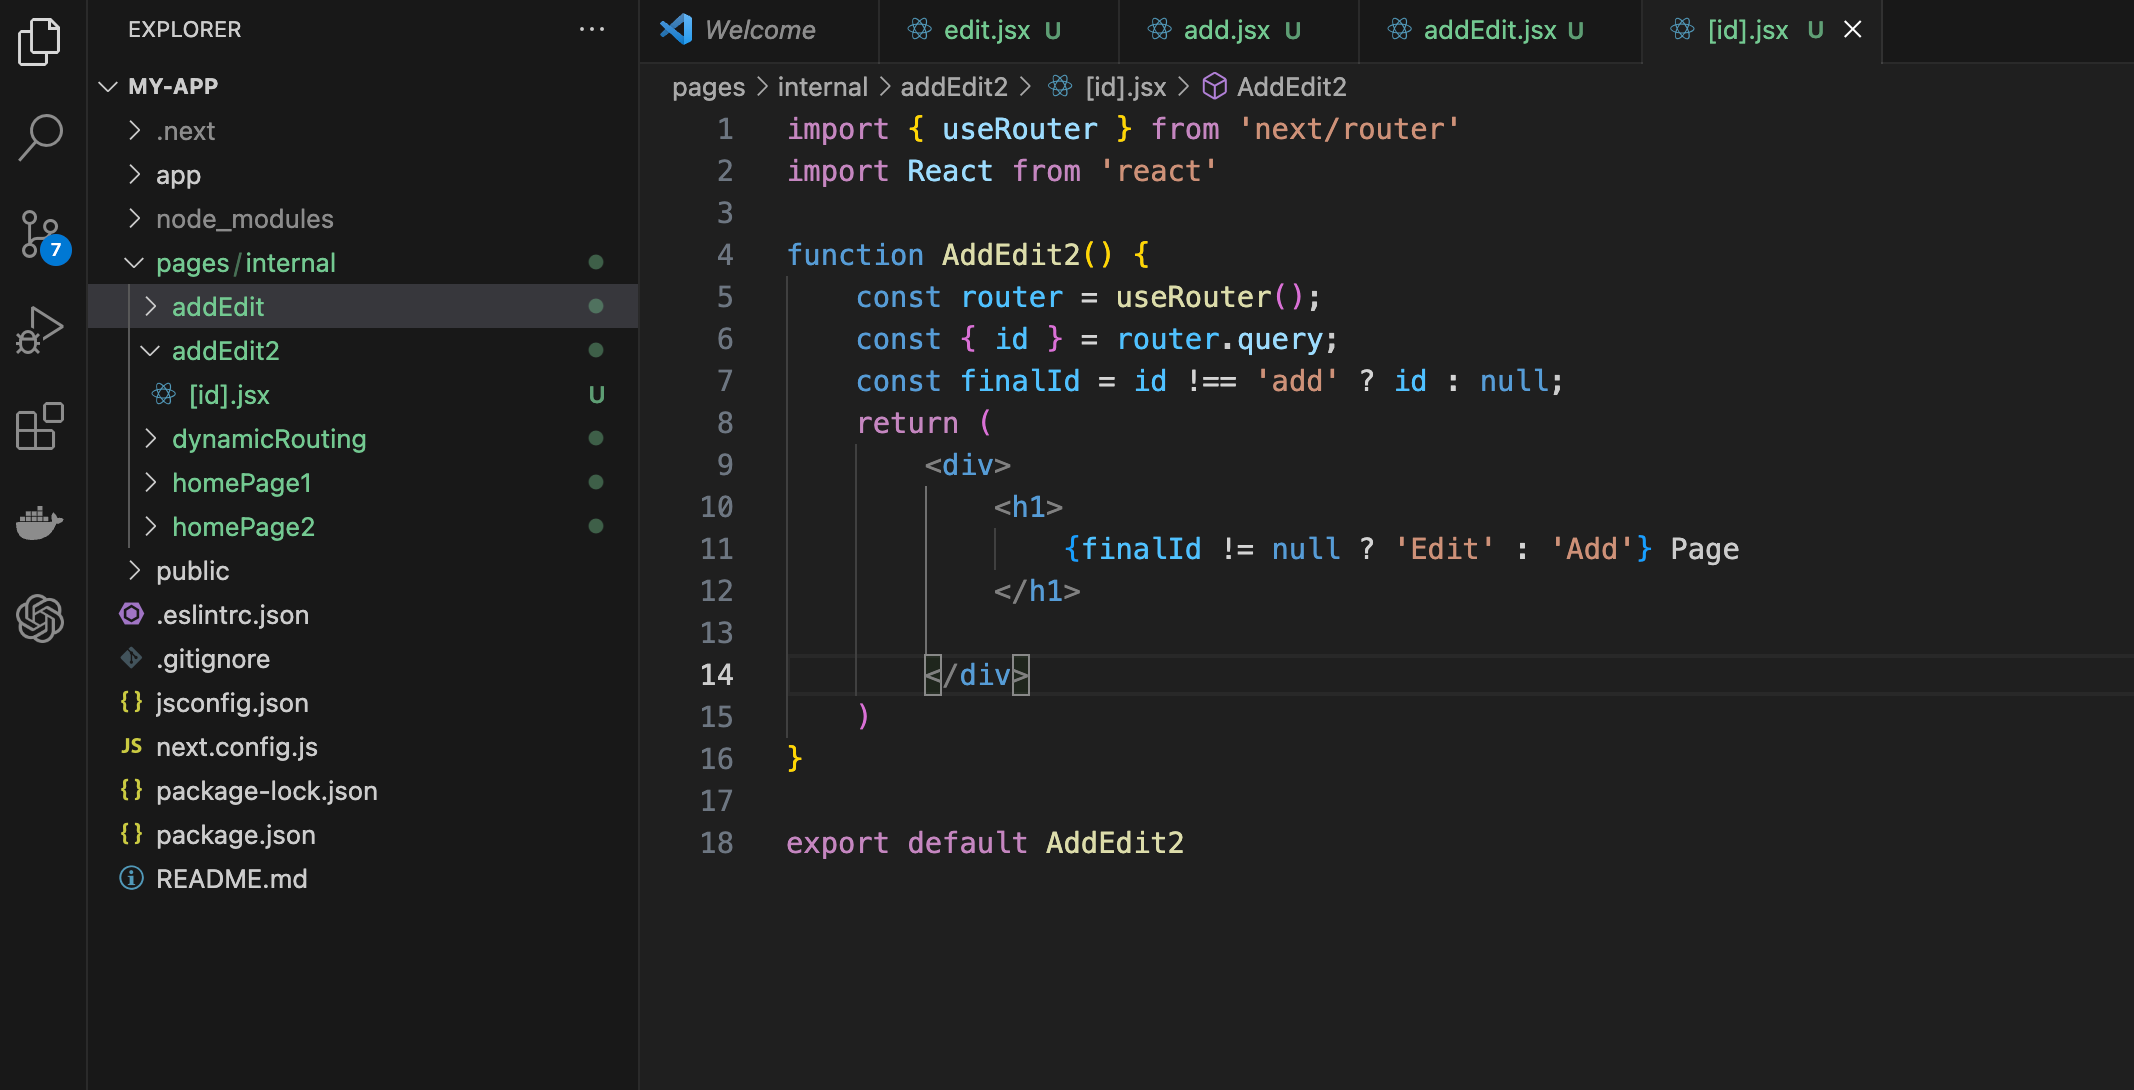
The below two UI that can be seen if we open the following routes
Add Page: localhost:3000/internal/addEdit2/add
Edit Page: localhost:3000/internal/addEdit2/edit
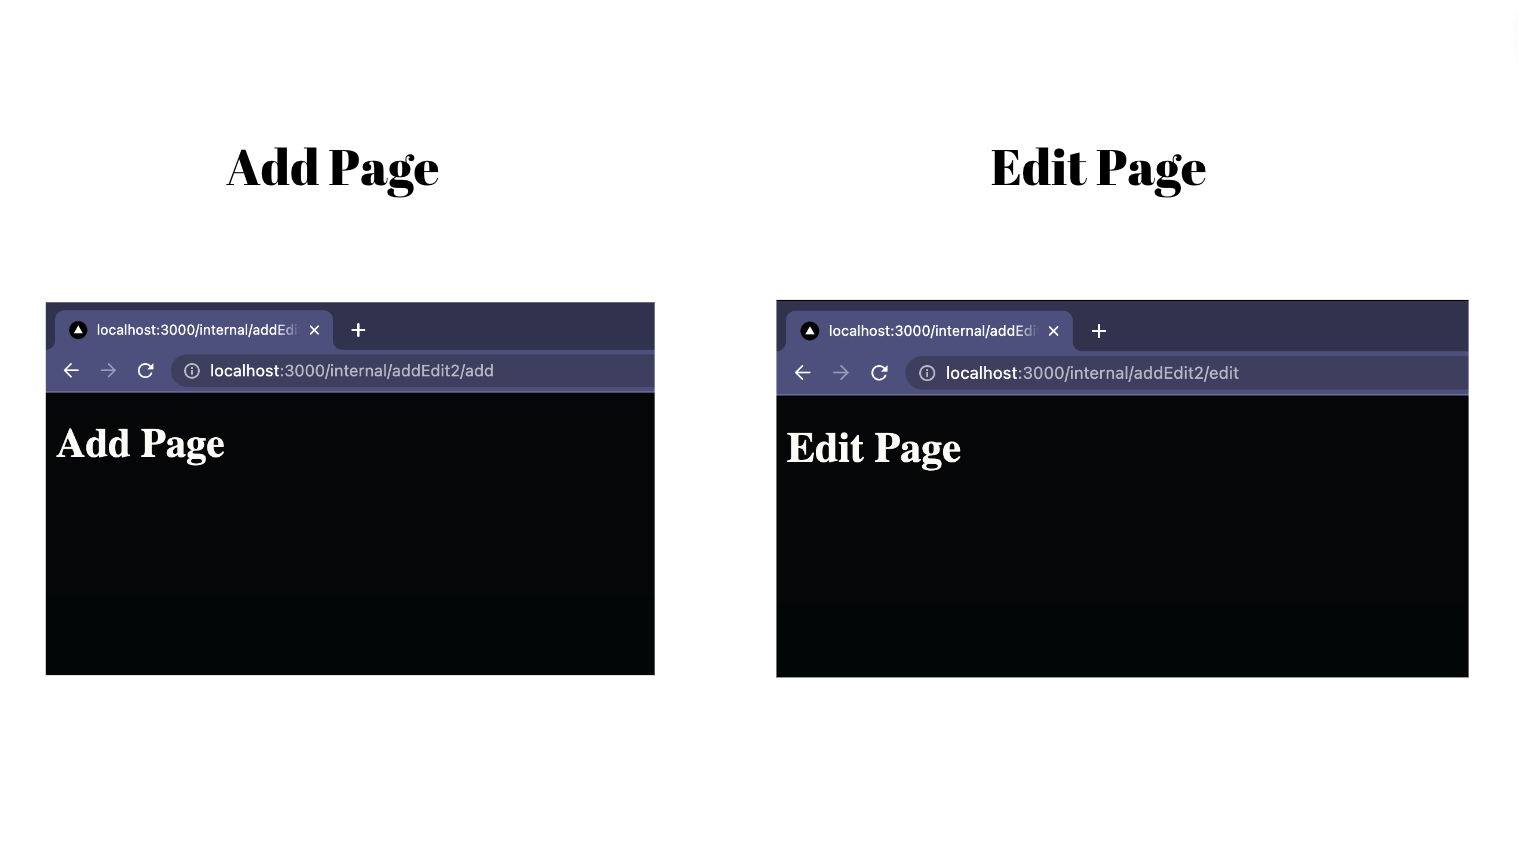
This second way of solving the same problem will avoid the hustle of maintaining two different components. Just for calling the child addEdit form.
Final Thoughts
There was a tutorial about maintaining the route and dynamic routing in the next js project. We need to have multiple ways at our disposal when we are planning to solve any problem.
You may follow any of the approaches for your project, and share if you have any different approaches in the comments.
Suggested Article
Perks / Hardships of Becoming A Technical Blogger 2023 | Technical.
About The Author
Apoorv Tomar is a software developer and part of Mindroast. You can connect with him on Twitter, and Telegram. Subscribe to the newsletter for the latest curated content. Don’t hesitate to say ‘Hi’ on any platform, just stating a reference of where did you find my profile.
More content at PlainEnglish.io.
Sign up for our free weekly newsletter. Follow us on Twitter, ***LinkedIn, YouTube, and Discord.***
